Parsec で宅内リモート環境を構築する
仕事部屋にある Gaming PC を子どもにリビングから使えるようにできないかなと考えていたら、Parsec というイケてるリモートデスクトップソフトウェアがあるらしい。
(ちなみに Windows 標準のリモートデスクトップでマイクラ起動したら重くてまったく使い物にならんかった)
普通に Parsec インストールして繋いで使えたので喜んでたら、その後いくつか躓いたのでメモ。
ホスト PC に繋がっているモニターの電源落としたらクライアント PC の parsec も真っ白になる問題
なにこれって思ったら、どうやら parsec はグラボからモニタ出力の間をインターセプトして、クライアントに送信する仕組みっぽい。なので、ホストのモニター切るとグラボはモニター接続なしと認識して、描画しない(=グラボ動かない)らしい。
そのためにはダミーの hdmi とか挿して無理やり認識させるとのこと。
ホスト PC のモニターは displayport で接続し、唯一の hdmi ポートにはダミーの hdmi プラグを購入して挿した。
その後、Windows でモニターとダミーモニターをミラーリングに設定。
ちなみに拡張モニタにするとオンライン会議でダミーモニターをフルスクリーンでプレゼンモードにして、手元のモニターはメモ用にしたり、発表者ノートにしたりするハックがあるらしい。
イケてるビジネスパーソンの常識。
スリープ状態からの解除
普段、ホスト PC はスリープにしているのでリモートでスリープ解除したいので調べたら
- BIOS の wake up on lan を有効にする
- ネットワークアダプタの wol を有効にする
- クライアント PC に Easy WOL インストールして、ホスト PC の Mac アドレス指定して、ブロードキャスト
で普通にスリープ解除できた。
クライアント PC から Parsec 軽油で Windows ログインするとマウスを認識してくれない
ホスト PC のマウスを少し動かすとクライアント PC 上の Parsec 上でもマウス動かせるようになる。
どうやら、スリープからの復帰時(多分ホスト PC の起動時も)に物理マウスが接続されてないと windows がマウスがないと認識しているっぽい。
普段ホスト PC で使っている Blutooth マウスはマウスを少し動かすとその信号を拾って初めて windows 側がマウスを認識する、ので Parsec 側でも動かせるようになるっぽい。
解決策は
- 物理マウスをダミーで接続しておく
- Wacom のドライバ入れる
- マウスキーを有効にする
のどれからしいが、2. はダウンロードにシリアル必要なので諦め、3. は設定しても改善せず。
仕方ないので、1. で家に転がっていた安物の USB マウスを接続していったん解決。
結果
必要なときにリモートでスリープ解除して、Parsec で起動してリモートログインする仕組みはできた。
Apex はさすがにラグかったが、マイクラぐらいなら重い mod を入れても Gaming PC のグラボを生かして、非力なノート PC でも十分使えるのがわかった。
Ubuntu 20.04.3 LTS(64bit) on Raspberry Pi 4 Model B(8GB) で 空冷ファンの制御をする
背景
先日ラズパイでクラスタを組んだものの、電源入れっぱなしのため寝るときに小さく聞こえるファンの音が気になって仕方ない。
しかし毎回電源落とすのも面倒。
ただ、ラズパイにはPWM制御のファンはそのままではつけられないらしい。
困っていたところ、トランジスタというものを挟んでファンを接続すれば指定したCPU温度をしきい値にしてファンのON/OFF制御はできることを知った。 (回転数の制御はできない)
とりあえずトランジスタを手に入れて試しにつなげて動作確認してみる
トランジスタを手に入れる
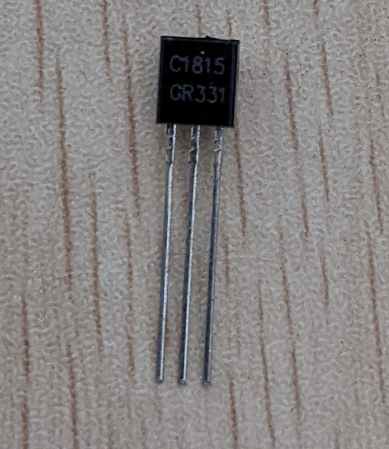
トランジスタは千石電商さんで 2SC1815-GR を購入。
品番の GR とか Y とか BL とか意味不明だったので調べたら増幅率の違いや信頼性などでランク分けがあるらしい。
トランジスタやダイオードの型番の読み方とルール - Electrical Information
よくわからんが、まぁGRぐらいでよかろうということで店頭で購入。
初めて秋葉原の千石電商さんに行ったが、あまりのパーツの量で見つけられる気がしなかったので店員さんに写真と型番見せたらすぐに教えてくれた。(とっても親切)
取り付ける
重い処理をするわけじゃないので、3.3Vの電源を使ってちょっとでも回転数下げて静音化する。
配線はこちらを参考にした。
白執事の徒然なる日々 Raspberry Pi で冷却ファンをPWM制御してみよう
ラズパイの設定
$ sudo raspi-config
で Performance Options > P4 Fan を選択して GPIOピン(物理ピン番号ではなくBCM番号、今回は18を指定)とファンを回す温度のしきい値(今回は60℃)を設定する。


raspi-config を再起動せずに終了して念の為 /boot/config.txt の最後の行にファン制御の設定が入っていることを確認してから再起動。
$ sudo cat /boot/config.txt

# Disable audio (added by raspberrypi-sys-mods)
dtparam=audio=no
[all]
dtoverlay=gpio-fan,gpiopin=18,temp=60000
sudo /sbin/shutdown -r now
しかし指定のCPU温度になってもFANが動かず。
どうやら、Ubuntu の場合は /boot/config.txt ではなく /boot/firmware/config.txt に設定する必要があることがわかった(後述)ので
[all]
dtoverlay=gpio-fan,gpiopin=18,temp=60000
の部分だけ /boot/firmware/config.txt に追記して無事に動いた。
いくつか謎が残る点とわかったこと
gpio readallで BCM 18ピンが出力High(1)になるのかなと思ったら変わらない件

60℃超えてファンが動き出したらV列が 1 になるのかなと思ったら変わらなかった。
よくわからんがちゃんと動いているのでヨシ
トランジスタの足の部分が狭すぎてジャンパケーブルをきれいに接続できない件
トランジスタが小さいので足の部分(?)が狭くてジャンパケーブルがきれいに刺さらない。
これどうすんの?
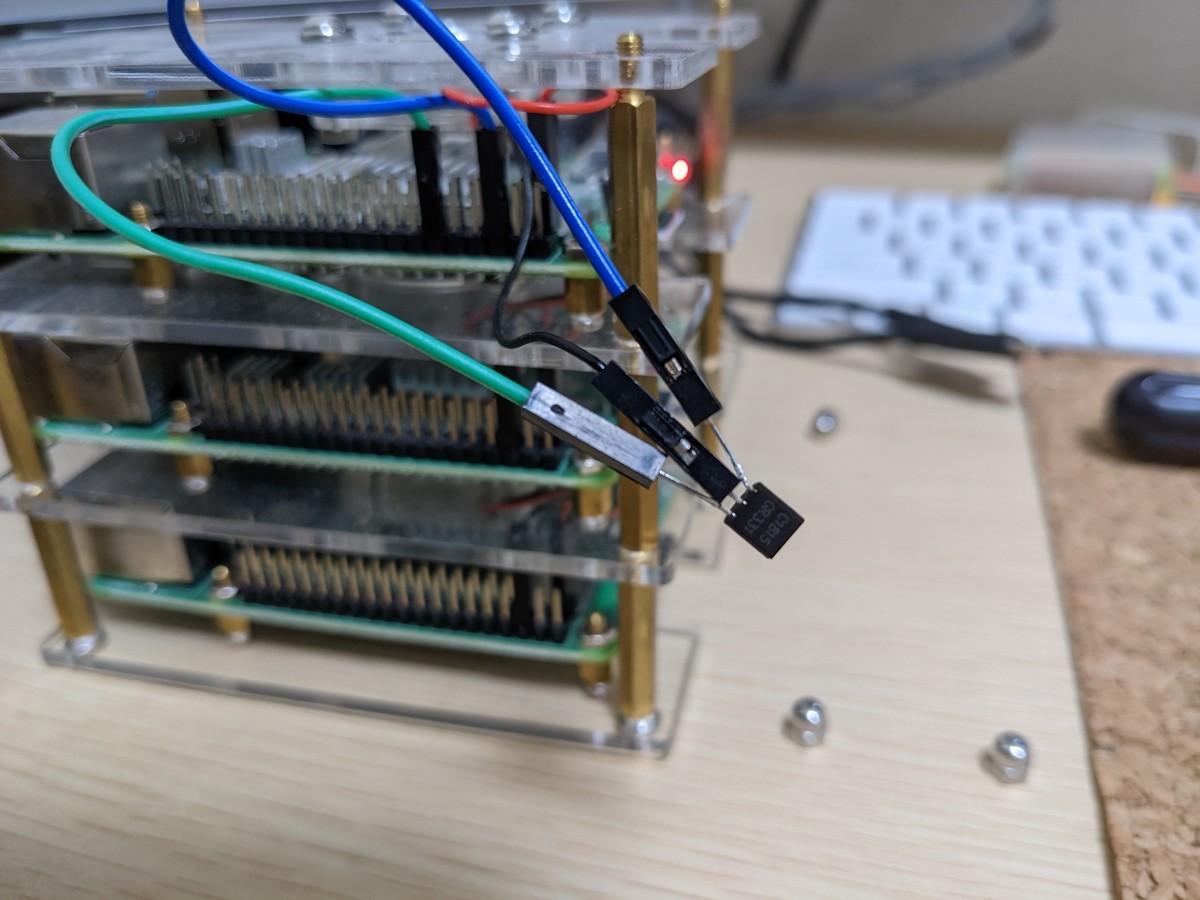
この件についてはピンソケットというものを使えばもうちょっとまともに接続できそうなので後日試してみる。
/boot/config.txt と /boot/firmware/config.txt の2つがある件
この2つの違いはなんなのか。
結論から書くと config.txt はPCなどであれば BIOS で設定するようなハードウェア設定を保存する設定ファイル とのこと。
OSの設定(config.txt) - Raspberry Pi公式ドキュメントを日本語訳
ラズベリーパイは組み込みプラットフォームなので、 普通のPCにあるようなBIOS がありません。 普通であればBIOSによって編集・保存される 様々なシステム設定のパラメータは、 ラズベリーパイでは config.txtというテキストファイルに保存されます。
ちなみに raspi-config コマンドはこの /boot/config.txt をGUIで設定できるユーティリティツールらしい。
そしてこの config.txt は Raspberry Pi OS の場合は /boot/config.txt から読み込まれるが、Ubuntuの場合は /boot/firmware/config.txt から読み込まれるらしい。
ARM/RaspberryPi - Ubuntu Wiki
The GPU firmware partition is mounted at /boot/firmware. The /boot/firmware/config.txt file contains the system configuration and refers to several other files within /boot/firmware. Note, it is likely that you will have to adapt third party instructions to these file locations.
んで、 /boot/firmware ディレクトリは boot 時に /dev/mmcblk0p1 がマウントされてるっぽい。
/dev/mmcblk0p1 は Raspberry Pi Imager でOSイメージを焼いたときに作成された領域なんだろう。
$ sudo less /var/log/syslog
- 略 -
Nov  3 10:21:35 ubuntu1 systemd[1]: boot-firmware.mount: Directory /boot/firmware to mount over is not empty, mounting anyway.
Nov  3 10:21:35 ubuntu1 systemd[1]: Mounting /boot/firmware...
Nov  3 10:21:35 ubuntu1 systemd[1]: Mounted /boot/firmware.
Nov  3 10:21:35 ubuntu1 systemd[1]: Reached target Local File Systems.
- 略 -


$ df -h
Filesystem      Size  Used Avail Use% Mounted on
udev            3.7G     0  3.7G   0% /dev
- 略 -
/dev/mmcblk0p1  253M  124M  129M  50% /boot/firmware
tmpfs           782M   28K  782M   1% /run/user/1001
config.txt の立ち位置と OS による参照元の違い、マウントされるデバイスが整理できたのでなんとなく腑に落ちた。
raspi-config での設定変更が Ubuntu の場合に反映されない件
問題とワークアラウンド
以前の記事で Ubuntu でも raspi-config コマンドが使えるようにインストール方法をメモした。
waysaku.hatenablog.com
しかし、 raspi-config コマンドは config.txt のGUI設定ツールなのでそのまま使うと /boot/config.txt に書き込まれる模様。
そのため raspi-config を使う場合は、コマンド実行前に
$ sudo mount /dev/mmcblk0p1 /boot
をしてマウント先を /boot/firmware から /boot に変更しておく必要がありそう。
もしくはいったん /boot/config.txt に書き出してから手動で /boot/firmware/config.txt にコピーするなり、変更箇所だけ書き写すとかする必要がある。
以前書いたraspi-configのインストール手順についてメモを見ると debian のパッケージとしてインストールしている。
なので、よくよく考えたらdebian 向けのパッケージなので特に Ubuntu 向けのカスタマイズは入ってないということか。(Raspberry Pi OSも debian ベースなのでUbuntuは想定してないとか?)
raspi-config のソースコードにも /boot/config.txt がハードコードされた。
github.com
本当に Ubuntu では /boot/configt.txt は読み込まれないのか
Ubuntu で本当に /boot/config.txt が読み込まれないのか確認するために、GPIOのFAN制御の設定の
[all]
dtoverlay=gpio-fan,gpiopin=18,temp=60000
の項目を
/boot/config.txtに設定して、/boot/firmware/config.txtから削除すると指定のCPU温度になってもFANが動かない/boot/config.txtから削除して、/boot/firmware/config.txtに設定すると指定のCPU温度になるとFANが動いた/boot/config.txtはtemp=60000、/boot/firmware/config.txtはtemp=70000で設定すると70℃でFANが動き始めた
ので、挙動的には /boot/config.txt があっても (Ubuntuにおいては) 無視されて、 /boot/firmware/config.txt を読み込んでるっぽい。
Ubuntu 20.04.3 LTS(64bit) on Raspberry Pi 4 Model B(8GB) でオンボードbluetoothを使う
結論
bluetoothまわりのパッケージが linux-firmware-raspi2 とコンフリクトして手動でパッチを当てないと動かない
対策
素直に市販のUSBドングルをぶっ刺せばマウスもスピーカーも問題なく利用できた
原因
どうやら linux-firmware-raspi2 が依存している bluetoothパッケージのバージョンになんか問題があるっぽい。
いくつかのブログを参考にしたところ以下の手順で使えるようにはなるっぽい(試してない)
linux-firmware-raspi2をいったんapt removeで削除(ここでlinux-firmware-raspi2が依存しているpi-bluetoothなども一緒に削除される)- 最新の
pi-bluetoothなどをコンフリクトせずにインストールできるようになったのでapt installする- インストールしたbluetoothの関連ファイルを拾ってひとまとめにしておく (
tar czf)- [02] でインストールした
pi-bluetoothなどをapt removeする- 改めて
linux-firmware-raspi2をapt installする(ここでlinux-firmware-raspi2が依存するpi-bluetoothなども再インストールされる)- [03] でひとまとめにしておいた関連ファイルを同じディレクトリに展開して上書きする
Ubuntu 18.0.4 for Raspberry Pi B4 で Bluetooth を使いたい
https://www.hiro345.net/blogs/hiro345/archives/19932.html
Raspberry Pi 4に Ubuntu server 18.04をインストール
https://qiita.com/hiro-han/items/56c4fb6a1ad4c1713a7f#bluetooth%E3%81%AE%E8%A8%AD%E5%AE%9A
しかし、この方法は手動で bluetooth 関連ファイルを上書きして動かせるようにしているので今後関連するパッケージが apt update された場合に動かなくなる可能性があると思ったので私はこの方法は諦めた。
素直にUSBドングル買って取り付けたらめちゃくちゃスムーズに bleutooth 使えたのでそちらがオススメです。
エラーなどのメモ
pi-bluetoothインストールしようとしたらよくわからんパッケージ依存ぶっこわれたので復旧方法
$ sudo apt install pi-bluetooth
....

$ sudo dpkg --configure -a
dpkg: dependency problems prevent configuration of pi-bluetooth:
 pi-bluetooth depends on bluez-firmware; however:
  Package bluez-firmware is not installed.

dpkg: error processing package pi-bluetooth (--configure):
 dependency problems - leaving unconfigured
Errors were encountered while processing:
 pi-bluetooth

$ sudo dpkg -P --force-depends pi-bluetooth
apt upgradeすると Sub-process なんちゃらのエラーが出てコケる
どのタイミングでこのエラーが出るようになったのが覚えていないが、raspi-configをインストールした影響か、 bluetooth まわりを色々いじってて pi-bluetooth とかそのへんインストールしたり削除したりした影響?
apt (dkpg)まわりのゴミ設定が残ってたのが原因だった
$ sudo apt upgrade
Reading package lists... Done
Building dependency tree
Reading state information... Done
Calculating upgrade... Done
0 upgraded, 0 newly installed, 0 to remove and 0 not upgraded.
1 not fully installed or removed.
After this operation, 0 B of additional disk space will be used.
Do you want to continue? [Y/n] y
Setting up raspberrypi-kernel (1:1.20210805-1) ...
run-parts: executing /etc/kernel/postinst.d/apt-auto-removal 5.10.52+ /boot/kernel.img
run-parts: executing /etc/kernel/postinst.d/initramfs-tools 5.10.52+ /boot/kernel.img
run-parts: executing /etc/kernel/postinst.d/unattended-upgrades 5.10.52+ /boot/kernel.img
run-parts: executing /etc/kernel/postinst.d/update-notifier 5.10.52+ /boot/kernel.img
run-parts: executing /etc/kernel/postinst.d/xx-update-initrd-links 5.10.52+ /boot/kernel.img
run-parts: executing /etc/kernel/postinst.d/zz-flash-kernel 5.10.52+ /boot/kernel.img
/etc/kernel/postinst.d/zz-flash-kernel:
Using DTB: bcm2711-rpi-4-b.dtb
Couldn't find DTB bcm2711-rpi-4-b.dtb on the following paths: /etc/flash-kernel/dtbs /usr/lib/linux-image-5.10.52+ /lib/firmware/5.10.52+/device-tree/
Installing  into /boot/dtbs/5.10.52+/./bcm2711-rpi-4-b.dtb
cp: cannot stat '': No such file or directory
run-parts: /etc/kernel/postinst.d/zz-flash-kernel exited with return code 1
dpkg: error processing package raspberrypi-kernel (--configure):
 installed raspberrypi-kernel package post-installation script subprocess returned error exit status 1
Errors were encountered while processing:
 raspberrypi-kernel
E: Sub-process /usr/bin/dpkg returned an error code (1)
よくわからないが、raspi-configをインストールしたときにboot loaderまわりに変更が入っているのが原因かな?わからない。 ここを見て解決 ( https://qiita.com/yukari-n/items/d1b17bd37036f120153c )
$ sudo dpkg --audit
The following packages are only half configured, probably due to problems
configuring them the first time.  The configuration should be retried using
dpkg --configure <package> or the configure menu option in dselect:
 raspberrypi-kernel   Raspberry Pi bootloader

sudo rm /var/lib/dpkg/info/raspberrypi-kernel.postinst
sudo rm /var/lib/dpkg/info/raspberrypi-kernel.postrm
sudo rm /var/lib/dpkg/info/raspberrypi-kernel.prerm

$ sudo apt upgrade
Reading package lists... Done
Building dependency tree
Reading state information... Done
Calculating upgrade... Done
0 upgraded, 0 newly installed, 0 to remove and 0 not upgraded.
1 not fully installed or removed.
After this operation, 0 B of additional disk space will be used.
Do you want to continue? [Y/n] y
Setting up raspberrypi-kernel (1:1.20210805-1) ...
Ubuntu 20.04.3 LTS(64bit) on Raspberry Pi 4 Model B(8GB) で普段使いのPC環境を整える
ラズパイが Arm アーキテクチャであることに加えて、Raspbian OS の 64bit 版の正式版が出ていないこともありラズパイで 64bit 化があまり進んでいないのか Armアーキテクチャ + 64bit を現段階での最新である Raspberry Pi 4 MNodel B で使うのはかなりツラそうに感じた。
解像度がデフォルトから変更できない件
これで解決 https://hirlab.net/nblog/category/raspberrypi/art_1114/
Chromiunインストール
sudo snap install chromium
Chromium は GoogleアカウントのブラウザSyncできなくなったっぽい。残念。
でもFirefox使い慣れないので Chromium 使う
KeyMapの変更と日本語入力
入力ソースにJapaneseでいくつか種類が選べるが、MozcというのがGoogle IMEのことらしい。
設定の地域と言語から追加すればOK。
ついでにTweaksというのをインストールしてCapsキーをCTRLに変更
https://blog2.logical-dice.com/posts/2021/02/11/ubuntu-20-10-initialize/
Mozcの設定まわりはここに詳しく説明されている
https://blog.cobli.jp/p/blog-page_68.html
Visual Studio Code
さすがのMicrosoft、ちゃんとArm 64bit版パッケージが用意されていてスムーズにインストールできた
https://code.visualstudio.com/download#
システムモニターをメニューバーに表示する
https://qiita.com/nanbuwks/items/3bccce7f608c9c9091db
インストールできなかったアプリたち(ブラウザ版で代用する)
1password
debパッケージからインストールしたり、1password リポジトリ追加したり試したけど Unable to locate package 1password のエラーでインストールできず。
ログ見ると amd64 とあるので Arm 向けのパッケージが用意されてないとかそんな感じっぽい
sudo apt install ./1password-latest.deb
Reading package lists... Done
Building dependency tree
Reading state information... Done
Note, selecting '1password:amd64' instead of './1password-latest.deb'
Some packages could not be installed. This may mean that you have
requested an impossible situation or if you are using the unstable
distribution that some required packages have not yet been created
or been moved out of Incoming.
The following information may help to resolve the situation:

The following packages have unmet dependencies:
 1password:amd64 : Depends: libasound2:amd64 but it is not installable
                   Depends: libatk-bridge2.0-0:amd64 but it is not installable
                   Depends: libatk1.0-0:amd64 but it is not installable
                   Depends: libc6:amd64 (>= 2.27) but it is not installable
                   Depends: libcurl4:amd64 but it is not installable
                   Depends: libdrm2:amd64 but it is not installable
                   Depends: libgbm1:amd64 but it is not installable
                   Depends: libgtk-3-0:amd64 but it is not installable
                   Depends: libnotify4:amd64 but it is not installable
                   Depends: libnss3:amd64 but it is not installable
                   Depends: libxcb-shape0:amd64 but it is not installable
                   Depends: libxcb-xfixes0:amd64 but it is not installable
                   Depends: libxshmfence1:amd64 but it is not installable
                   Recommends: libappindicator3-1:amd64 but it is not installable
                   Recommends: libappindicator1:amd64 but it is not installable
E: Unable to correct problems, you have held broken packages.
Dropbox
公式リポジトリはArmをサポートしていない
公式パッケージもArmサポートしていない(ダウンロードにアーキテクチャ選択はないので、x86, amd64前提っぽい)
ソースコードからビルドしようとしたが依存ライブラリも軒並みArm版を用意する必要があるっぽかったので心が折れた
$ ./configure
checking for a BSD-compatible install... /usr/bin/install -c
checking whether build environment is sane... yes
.
. 省略
.
checking pkg-config is at least version 0.9.0... yes
checking for NAUTILUS... no
configure: error: Package requirements (libnautilus-extension >= 2.16.0) were not met:

No package 'libnautilus-extension' found

$ sudo apt install libnautilus-extension-dev
Reading package lists... Done
Building dependency tree
Reading state information... Done
Some packages could not be installed. This may mean that you have
requested an impossible situation or if you are using the unstable
distribution that some required packages have not yet been created
or been moved out of Incoming.
The following information may help to resolve the situation:

The following packages have unmet dependencies:
 libnautilus-extension-dev : Depends: libgtk-3-dev (>= 3.22.27) but it is not going to be installed
Ubuntu 20.04.3 LTS(64bit) on Raspberry Pi 4 Model B(8GB) の環境構築
- ネットワーク設定
- waysakuユーザーの追加とubuntuユーザーをsudo不可にする
- パッケージ更新と各種パッケージのインストール
- vcgencmd をインストールしてCPU温度をmackerelで監視設定
- Raspberry PiのGPIOを操作する gpio コマンドのインストール
- raspi-configのインストール
- Ubuntu Desktop環境のインストール
Raspbian OS 64bit がまだ正式版が出ていないけど、せっかくの Raspberry Pi 4 なので64bitを活用したいので Ubuntu にした。
また、Raspberry Pi Imager から Ubuntu 20.04.3 LTS(64bit) の Desktop 版を入れたかったが、リストになかったので仕方なくServer版をインストールする。
Raspberry Pi Imager の最新版ではWIFI設定やSSH設定もできるようになっていたが、どうやらRaspbian OSのみ対応っぽい。
他にも、OSイメージを書き込んだSDカードを手元のPCにマウントしてルートディレクトリに設定ファイルを置くとWIFI設定とかを事前にできるらしいけど、 Ubuntu でもできるのかは未確認。
幸いにもモニタ、マウス、キーボードはあるので、普通にUbuntu 20.04.3 LTS(64bit) Server イメージを書き込んだSDカードをラズパイ本体に刺して起動してから設定する。
以下、セットアップメモ
ネットワーク設定
cp /etc/netplan/50-cloud-init.yaml /etc/netplan/99-cloud-init.yaml
vi /etc/netplan/99-cloud-init.yaml
network:
    version: 2
    ethernets:
        eth0:
            dhcp4: true
            optional: true
----ここから追記-----
    wifis:
        wlan0:
            access-points:
                {YOUR SSID}:
                    password: "PASSWORD"
            dhcp4: false
            addresses:
                - 192.168.11.210/24
            gateway4: 192.168.11.1
            nameservers:
                addresses:
                    - 8.8.8.8
waysakuユーザーの追加とubuntuユーザーをsudo不可にする
sudo adduser waysaku
sudo gpasswd -a waysaku sudo
sudo gpasswd -d ubuntu sudo

sudo passwd ubuntu   # ubuntuユーザーはデフォルトユーザとして何かしらOSのデフォルト設定に絡んでるかもしれないので削除せずにパスワード変更だけしておく
パッケージ更新と各種パッケージのインストール
sudo apt update
sudo apt upgrade

sudo apt install net-tools vim git make gcc build-essential -y
vcgencmd をインストールしてCPU温度をmackerelで監視設定
$ wget -q -O - https://mackerel.io/file/script/setup-all-apt-v2.sh | MACKEREL_APIKEY='3KmhW92duiSagrgP3UZJQ2snPgmAJjud1dDwt4vEMxdK' sh

$ sudo apt install libraspberrypi-bin -y
$ sudo vcgencmd measure_temp
temp=48.7'C

$ sudo touch /etc/mackerel-agent/temperature.sh
$ sudo vi /etc/mackerel-agent/temperature.sh
---
#!/bin/bash
SECONDS=$(date '+%s')
NAME='temperature.cpu'
VALUE=$(vcgencmd measure_temp | grep -o -e "[0-9]\+\.[0-9]\+")
echo -e "${NAME}\t${VALUE}\t${SECONDS}"
----
$ sudo chmod 755 /etc/mackerel-agent/temperature.sh


$ sudo vi /etc/mackerel-agent/mackerel-agent.conf
---
[plugin.metrics.temp]
command = "/etc/mackerel-agent/temperature.sh"
---


$ sudo systemctl restart mackerel-agent     # mackerelエージェント再起動
$ sudo journalctl -u mackerel-agent.service # ログ確認
Raspberry PiのGPIOを操作する gpio コマンドのインストール
apt で wiringgpi をインストールしても gpio コマンドはエラーになる
$ sudo apt install wiringpi
$ gpio readall
Oops - unable to determine board type... model: 17
$ sudo apt remove wiringpi
どうやらgpioコマンドである WiringPi は既に開発停止しているらしい(作者がもうやってられないので開発やめるわってことらしい)
なので、aptでの WiringPi は最新パッケージが古くてRaspberry Pi 4Bのモデルに対応していない。
それに対応するために個別にRaspberry Pi 4Bに対応したパッケージを公開してくれているが、32bit版しかない http://wiringpi.com/wiringpi-updated-to-2-52-for-the-raspberry-pi-4b/
$ wget https://project-downloads.drogon.net/wiringpi-latest.deb
$ sudo dpkg -i wiringpi-latest.deb
dpkg: error processing archive wiringpi-latest.deb (--install):
 package architecture (armhf) does not match system (arm64)
Errors were encountered while processing:
 wiringpi-latest.deb
なのでソースからビルドして gpio コマンドをインストールする https://github.com/WiringPi/WiringPi/blob/master/INSTALL
$ mkdir ~/git
$ cd ~/git
$ git clone https://github.com/WiringPi/WiringPi.git
$ cd WiringPi/
$ ./build

$ sudo vim /etc/ld.so.conf
---
include /etc/ld.so.conf.d/*.conf
/usr/local/lib   <- 追加する
---
$ sudo ldconfig

$ sudo gpio readall
 +-----+-----+---------+------+---+---Pi 4B--+---+------+---------+-----+-----+
 | BCM | wPi |   Name  | Mode | V | Physical | V | Mode | Name    | wPi | BCM |
 +-----+-----+---------+------+---+----++----+---+------+---------+-----+-----+
 |     |     |    3.3v |      |   |  1 || 2  |   |      | 5v      |     |     |
 |   2 |   8 |   SDA.1 | ALT0 | 1 |  3 || 4  |   |      | 5v      |     |     |
 |   3 |   9 |   SCL.1 | ALT0 | 1 |  5 || 6  |   |      | 0v      |     |     |
 |   4 |   7 | GPIO. 7 |   IN | 1 |  7 || 8  | 1 | ALT5 | TxD     | 15  | 14  |
 |     |     |      0v |      |   |  9 || 10 | 1 | ALT5 | RxD     | 16  | 15  |
 |  17 |   0 | GPIO. 0 |   IN | 0 | 11 || 12 | 0 | IN   | GPIO. 1 | 1   | 18  |
 |  27 |   2 | GPIO. 2 |   IN | 0 | 13 || 14 |   |      | 0v      |     |     |
 |  22 |   3 | GPIO. 3 |   IN | 0 | 15 || 16 | 0 | IN   | GPIO. 4 | 4   | 23  |
 |     |     |    3.3v |      |   | 17 || 18 | 0 | IN   | GPIO. 5 | 5   | 24  |
 |  10 |  12 |    MOSI | ALT0 | 0 | 19 || 20 |   |      | 0v      |     |     |
 |   9 |  13 |    MISO | ALT0 | 0 | 21 || 22 | 0 | IN   | GPIO. 6 | 6   | 25  |
 |  11 |  14 |    SCLK | ALT0 | 0 | 23 || 24 | 1 | OUT  | CE0     | 10  | 8   |
 |     |     |      0v |      |   | 25 || 26 | 1 | OUT  | CE1     | 11  | 7   |
 |   0 |  30 |   SDA.0 |   IN | 1 | 27 || 28 | 1 | IN   | SCL.0   | 31  | 1   |
 |   5 |  21 | GPIO.21 |   IN | 1 | 29 || 30 |   |      | 0v      |     |     |
 |   6 |  22 | GPIO.22 |   IN | 1 | 31 || 32 | 0 | IN   | GPIO.26 | 26  | 12  |
 |  13 |  23 | GPIO.23 |   IN | 0 | 33 || 34 |   |      | 0v      |     |     |
 |  19 |  24 | GPIO.24 |   IN | 0 | 35 || 36 | 0 | IN   | GPIO.27 | 27  | 16  |
 |  26 |  25 | GPIO.25 |   IN | 0 | 37 || 38 | 0 | IN   | GPIO.28 | 28  | 20  |
 |     |     |      0v |      |   | 39 || 40 | 0 | IN   | GPIO.29 | 29  | 21  |
 +-----+-----+---------+------+---+----++----+---+------+---------+-----+-----+
 | BCM | wPi |   Name  | Mode | V | Physical | V | Mode | Name    | wPi | BCM |
 +-----+-----+---------+------+---+---Pi 4B--+---+------+---------+-----+-----+

$ gpio -g mode 3 out # でGPIO3(BCM) が OUT(出力)に変更できる
$ gpio -g write 17 1 # でGPIO17(BCM) を信号を出力する(= 3.3Vの電圧を流す)
無事動いた。
※ ちなみに Ubuntu 21.04 でもビルドできました
コマンドラインからGPIOを操作する https://tomaberry.hatenablog.com/entry/2017/02/12/155910
raspi-configのインストール
Raspberry Pi OS と違い Ubuntu の場合は ラズパイ本体のデバイス設定をいろいろと変更できる便利コマンドである raspi-config がインストールされていないので手動でインストールする
https://linuxtut.com/en/a252676a3ce6bd1410da/
今回は空冷FANの動きを制御するために raspi-config を使いたい
$ sudo echo "deb http://archive.raspberrypi.org/debian/ bullseye main" >> /etc/apt/sources.list
$ sudo apt-key adv --keyserver hkp://keyserver.ubuntu.com:80 --recv-keys 7FA3303E
$ sudo apt-get update
$ sudo apt-get install raspi-config
$ sudo mount /dev/mmcblk0p1 /boot

$ sudo raspi-config  # FANの制御の設定変更する
$ cat /boot/config.txt
[all]
dtoverlay=gpio-fan,gpiopin=17,temp=70000
Ubuntu Desktop環境のインストール
sudo apt install -y ubuntu-desktop
Desktop環境インストールしたらなぜかWIFI繋がらなくなった。
etc/netplan/99-cloud-init.yaml を削除してubuntu-desktopを入れたGUIからWIFI設定したら無事WIFIに繋がった。
よくわからん。
Chrome (Chromium) for iOSのビルド
Chrome for iOSをビルドしてみる
前回の調査の流れでChrome (Chromium) の指定のバージョンをビルドしてみたメモを残しておく。
Chromiumのビルド
基本
[iOS] Chromium for iOS がオープンソース化されたのでビルドしてみた Checking out and building Chromium for iOS
depot_toolsを使うとGoogleのリポジトリを使うための色々な便利ツールが入っているのでインストールする。
fetch ios でios向けのソースコードを取得できる。(過去のリリースビルドを取得したいので --no-history はつけない)
基本的な流れ
$ fetch ios                          # iOS向けのソースコード取得
$ cd src                               # srcに移動
$ python ios/build/tools/setup-gn.py        # 各プラットフォーム向けのディレクトリ作成などの事前準備
$ autoninja -C out/Debug-iphonesimulator gn_all          # ビルド
過去のリリースビルドでビルドしてみる
ローカルのChromiumソースを使ってChromium OSをビルドする
まずは Chrome Releases Release updates from the Chrome team でリリースビルドのバージョン番号をチェックする
バージョン番号がわかったらここでバージョン番号を入力して コミットハッシュ文字列を確認
OmahaProxy - Google Chrome
これが現時点でのiOSのリリースバージョンとコミットハッシュらしい
Log - 85.0.4183.92..85.0.4183.109 - chromium/src - Git at Google
iOS13以前のバージョン用のChromeをビルドするためにはXcodeの最新版(12)ではなく過去のバージョンに切り替える必要があるため、Apple Developer Downloads からXcode 11.7をダウンロードしておく。
旧バージョンのXcodeでアプリの動作確認するときの手順 - Qiita
$ fetch ios  # iOS向けのソースコード取得
$ cd src  # srcに移動
$ git checkout 7683ae7e63d35a9b87b2de15483090bf480e6a28     # 該当のコミットをチェックアウト

$ gclient sync            # 依存ライブラリなどの再Sync
$ gclient sync --with_branch_heads
$ gclient sync -D

$ xcode-select -p         # 現在使っているXcodeのバージョン確認
/Applications/Xcode.app/Contents/Developer
$ sudo xcode-select -s /Applications/Xcode_11.7.app/Contents/Developer/        # ダウンロードしたXcodeの旧版(11.7)に切り替え
$ xcode-select -p        # 確認
/Applications/Xcode_11.7.app/Contents/Developer

$ python ios/build/tools/setup-gn.py       # 各プラットフォーム向けのディレクトリ作成やパスなどの事前準備
$ autoninja -C out/Debug-iphonesimulator gn_all        # ビルド
ビルドが終わったら(3時間ぐらいかかった)、out/Debug-iphonesimulatorディレクトリに Chromium.app が出来ているのでそれをiOSシミュレーター起動してポイッとドロップすればインストール完了。
なんかエラーが出て設定見直した時は、out/以下を一度全削除してから python ios/build/tools/setup-gn.py すると諸々のパスの設定などが再作成されるっぽい。
iOS14におけるSafari以外のブラウザへのITP (Intelligent Tracking Prevention) 適用についての調査
iOS14におけるITPの影響の調査
結論 (推測含む)
iOS14のリリースの タイミングで Safari以外のブラウザアプリ及びWebviewアプリにITPがデフォルトで有効になった模様。
つまり、iOS上のChromeやFireFoxなどのブラウザも全てITP (Intelligent Tracking Prevention) がデフォルトで有効になり 3rd Party Cookie によるトラッキングは不可になった。
さらに、iOS13以前の端末でもこのタイミングで新規にブラウザやWebviewアプリをインストールした場合はITPがデフォルト有効になってしまう事象を観測した。
これまでの経緯
2019/12/23
UIWebViewからWKWebViewへ移行するようにアナウンスがされる。
新規アプリは2020/4月から、既存アプリの更新は2020年/12月からリジェクト対象
https://developer.apple.com/news/?id=12232019b
2020/6/22
WWDC2020でiOS14からWKWebViewが強化されることを発表
Discover WKWebView enhancements (25:11)
...to use it in their apps. And we're happy to announce that in iOS 14 and macOS Big Sur, ITP is enabled by default an all WKWebView apps. Users have the control here.
https://developer.apple.com/videos/play/wwdc2020/10188/?time=1511
2020/9/17
iOS14が (突然) 公開
iOS14にアップデートされるとアナウンス通り、WKWebViewを使っているWebviewは全てITPがデフォルトで有効になるためブラウザを含む全てのWebview利用アプリで3rd Party Cookieのトラッキングが無効化された
動作確認
| Safari | Chrome | |
|---|---|---|
| MacOS Catalina 10.15.6 | disabled | enabled |
| iPad/iOS13.7 | disabled | enabled |
| iPhone8/iOS14 | disabled | disabled |
| iPhone8/iOS13.7 (新規Chromeインストール) | disabled | disabled |
それぞれ、Treasure Dataが公開しているJS SDKで 3rd Party Cookieである td_global_id が書き込めるかで調査を実施した。
disabledの場合は
- fetchGlobalID()のコールバックはnullが入る
- Treasure Data上には毎回違う td_global_id が保存される のでITPが適用されていると思われる。
下記htmlをAWS S3上に配置してhttpsでアクセスして動作を確認。
<!DOCTYPE html>
<html lang="en">
<head>
  <meta charset="UTF-8">
  <title></title>

<script type="text/javascript">
!function(t,e){if(void 0===e[t]){e[t]=function(){e[t].clients.push(this),this._init=[Array.prototype.slice.call(arguments)]},e[t].clients=[];for(var r=function(t){return function(){return this["_"+t]=this["_"+t]||[],this["_"+t].push(Array.prototype.slice.call(arguments)),this}},s=["addRecord","blockEvents","fetchServerCookie","fetchGlobalID","fetchUserSegments","resetUUID","ready","setSignedMode","setAnonymousMode","set","trackEvent","trackPageview","trackClicks","unblockEvents"],n=0;n<s.length;n++){var c=s[n];e[t].prototype[c]=r(c)}var o=document.createElement("script");o.type="text/javascript",o.async=!0,o.src=("https:"===document.location.protocol?"https:":"http:")+"//cdn.treasuredata.com/sdk/2.4/td.min.js";var a=document.getElementsByTagName("script")[0];a.parentNode.insertBefore(o,a)}}("Treasure",this);
</script>

</head>
<body>
 <script type="text/javascript">
    var td = new Treasure({
        database: 'yusaku_test',
        writeKey: '3867/cf25f5e01f69e5d31e818c6ece9cf13e35d935ef',
        host: 'in.treasuredata.com',
        startInSignedMode: true
    });

  td.set('$global', 'td_global_id', 'td_global_id');
  td.fetchGlobalID(function(_gid) {
       document.getElementById('td_global_id').innerHTML = _gid;
       document.getElementById('td_client_id').innerHTML = td.client.track.uuid;

       td.trackPageview('cookie_test');
  });
</script>
td_global_id = <span id='td_global_id'>td_global_id</span><br/>
td_client_id = <span id='td_client_id'>td_client_id</span><br/>
</body>
</html>
影響範囲
影響する条件
1.iOS14の全てのブラウザアプリ、及びWebviewアプリ
2.iOS13以前で 2020/9/17 以降に 新規に AppStoreからインストールしたブラウザアプリ、及びWebviewアプリ (※1)
※1
2020/9/17以前からインストールしていたChromeで iPhone8/iOS13.7 及び iPad/iPadOS13.7 で 3rd Party Cookie のトラッキングを確認したところ問題なく動作していた。 (ITP未適用)
しかし
- iPhone8/iOS13.7 を iOS14 にアップデートしてキャッシュクリア後に計測してみたところ、3rd Party Cookie は 無効化されていた
- 別の iPhone8/iOS13.7 にAppStore経由で 新規に Chromeをインストールしてみたところ、3rd Party Cookie は 無効化されていた
- 別の iPhone6/iOS12.4 にAppStore経由で 新規に Chromeをインストールしてみたところ、3rd Party Cookie は 無効化されていた
- BrowserStack上で iPad/iPadOS11 でChromeを起動して計測してみたところ、3rd Party Cookie は 無効化されていた
- 上記ITP未適用のChromeと同じバージョン (85.0.4183.109) をソースコードからビルドし、iOSシミュレーターをiOS13.5で起動してインストールしてみたところ、3rd Party Cookie は 無効化されていた
そのため2020/9/17以前からインストールしているブラウザの場合には iOS14にしない限り 影響は出ないが、 新規に ブラウザをインストールした場合はITPが適用されているように思われる。
想定影響数
世界で見た時はiOS上のChromeのシェアは4% ~ 5%とのこと。2%という結果もあるらしい。
日本だけで見た場合はおおよそ iOS:Andoird = 45%:55% らしいので、全体の2% ~ 2.5%前後が影響する可能性あり。(モバイル計測だけ、且つ全てのiOSデバイスがiOS14にアップデートされた場合)
そもそも
iOS14リリース前でもChrome以外の主要ブラウザは3rd Party Cookieをブロック済みの模様 (FireFox、DuckDuckGo) 。
但し、MS Edgeは今回新規にインストールしているので、以前からインストールしていた場合は3rd Party Cookieが有効になっている可能性もあるので確証はない。
はっきりしない点
しかしながら、同じiOSのバージョン (13.7) で、Chromeのバージョン番号も同じなのにAppStore経由でインストールするタイミングが違うだけでそのアプリの挙動が変わるなんてことある?